Water beneath a mini split head needs attention before it damages nearby finishes. Pause cooling, protect the wall and floor, then note where the drip begins. Possible explanations include condensation, drainage trouble, melting ice, or an installation issue, but the wet spot alone can’t confirm the cause.
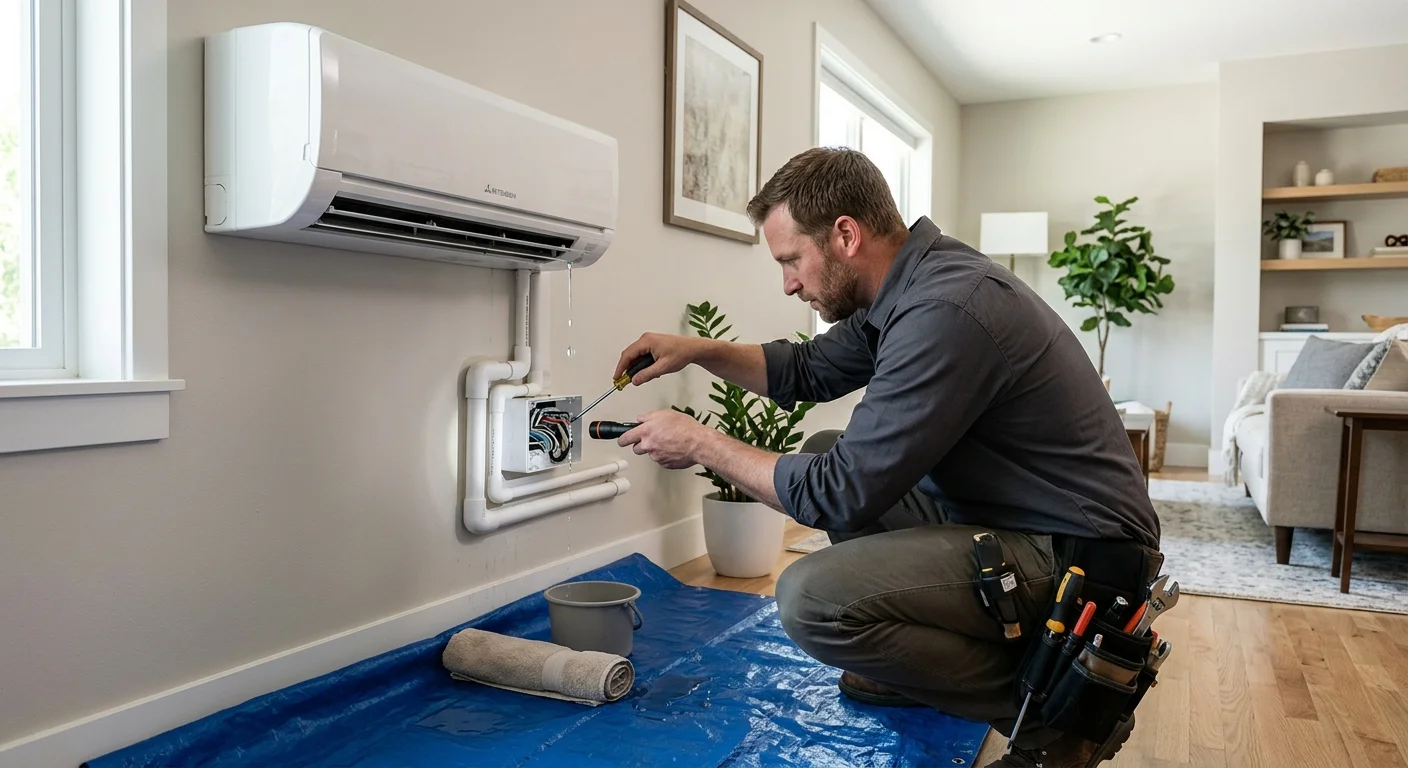
Indoor head drip: stop cooling and protect the wall
Pause the Cool mode, put a towel under the drip, and note whether water comes from the bottom center (drain) or around the whole chassis (coil ice). Oceanside and other marine-layer homes see more condensate. A clogged drain line is more common than a refrigerant leak as a first explanation, but only a licensed tech should open the refrigerant circuit.
Checklist
- Photograph the drip location.
- Check whether the outdoor unit is iced.
- See Fujitsu not cooling.
- See AC drain line clogged.
- Use mini split installation if the line was never trapped correctly.
Related: AC repair and Oceanside HVAC.
Where is the water appearing?
The exact starting point matters more than the size of the puddle. Water can travel across the casing before falling somewhere else. A drip from one corner doesn’t prove the problem sits behind that corner.
Start by drying the outside of the mini split head. Then watch without removing its cover. Note whether water appears along the front edge, one lower corner, or the wall behind it. Check whether the first visible mark begins at the unit or farther down the wall.
Look at the line-cover area, if your installation has one. Water near the wall opening may follow a different path than water leaving the front casing. Don’t pull the cover loose or probe behind the head. A photo showing the head, wall opening, and wet area gives a contractor better context.
Timing also helps. Record whether dripping starts during cooling, after cooling stops, or after visible frost disappears. Note whether the fan sounds and feels normal. These observations won’t diagnose the unit, but they can separate a steady drainage problem from an occasional event.
San Diego homes place mini splits in many settings. The unit might serve a coastal condo, an inland addition, or a South Bay bedroom. Coastal temperatures are milder than inland valleys, but location alone doesn’t explain a leak. The water’s path and the unit’s behavior are stronger clues.
What can a wet wall or floor tell you?
A wet wall shows where water ended up, not necessarily where it started. Moisture may run behind the mini split head, follow trim, or collect at a low point. Trace the visible edge upward without opening the unit or disturbing the wall.
Mark the boundary of the damp area with removable tape. That makes spreading easier to notice. Take a photo before drying the surface, then another if the mark returns. Include nearby baseboards, flooring, and the wall penetration in the frame.
The shape of the wet area can guide the inspection. A narrow trail below the head differs from a broad patch behind it. Water directly beneath one corner also differs from moisture appearing near a separate line cover. None of those patterns proves a blocked drain, a damaged pan, or poor routing. They simply show the contractor where to begin checking.
Move furniture and belongings away from the area. Use a towel or container to protect the floor while the unit remains paused. Don’t keep operating it merely to recreate a larger leak. Photos and notes usually provide a cleaner record.
Check adjacent surfaces too. Moisture near a window, roof line, plumbing fixture, or another appliance may have an unrelated source. If the source remains unclear, avoid labeling it as a mini split failure before inspection. Climate Pros SD can connect you with an independent pro for AC repair when the dripping returns or the wet area keeps spreading.
Which checks don’t require opening the unit?
Keep your inspection limited to visible conditions and normal controls. You don’t need to remove panels, disconnect tubing, or pour anything into the mini split head.
Use the remote to pause cooling while water is actively dripping. Write down the operating mode and temperature setting shown on the display. Note whether airflow had weakened, stopped, or changed shortly before the leak appeared. Don’t reach through the louvers to inspect internal parts.
From the floor, look for visible frost or ice around the outlet. Melting ice may resemble a drainage leak, but only an inspection can identify why icing occurred. Don’t scrape or chip it. Photograph what you can see and note when it disappears.
Check the wall around the unit and the visible line cover. Look for gaps, staining, or a trail that begins outside the casing. If the drain outlet is visible from ground level, note whether water appears there during cooling. Don’t disconnect the line, blow through it, or add drain cleaner.
A recent change can also matter. Tell the contractor about filter work, painting, wall repairs, furniture movement, or a recent installation. The timing doesn’t prove a connection, but it can focus the inspection.
For a broader look at related symptoms, read this guide to mini split repair in San Diego. It can help you organize what you’ve observed before speaking with a licensed HVAC professional.
How can drain routing affect the diagnosis?
The contractor first needs to understand how moisture is supposed to leave your particular unit. A drain may follow a visible exterior route, disappear into a wall, or rely on a pump installed elsewhere. Don’t assume your setup matches a diagram from another brand or home.
Routing changes what the pro checks next. The inspection may cover the drain pan, joints, supports, line direction, and pump operation when a pump is present. The contractor may also check whether the head sits as intended. Those conditions can’t be confirmed from the puddle alone.
Think about when the dripping began. A unit that leaked from its first cooling cycle presents a different history from one that operated without a visible leak before the symptom appeared. Share any recent construction, wall work, or movement near the line cover. Avoid adjusting the head or pushing on the drain route yourself.
A low corner on the mini split head doesn’t automatically identify a clog. Water could be following the casing from another point. Ice that later melts may also change when and where the drip appears. The contractor needs to compare the route with the unit’s condition during inspection.
Our guide to a clogged AC drain line explains what homeowners can observe without attempting invasive drain work. If the routing appears tied to the original layout, a pro who handles mini split installation can assess whether the setup needs correction.
When should an independent licensed pro inspect it?
Arrange an inspection when water returns after the unit is dried and paused. Repeated dripping, visible ice, weaker airflow, or a growing wet area all give the contractor useful starting points. A newly installed head that has leaked from the beginning also needs an installation-focused review.
A licensed HVAC pro can open the equipment and examine areas you can’t see safely from the room. The inspection may cover the drain pan, drain connections, routing, pump operation when present, airflow, and signs of icing. The findings determine whether the problem involves maintenance, repair, or installation correction.
Don’t approve work based only on a guess made from the puddle. Ask the pro to show you where the water started and explain the recommended correction. Ask what their diagnostic fee is and whether it applies toward the repair. Each company sets its own policy.
Climate Pros SD is a referral service. We match homeowners with licensed and insured independent HVAC professionals throughout San Diego County. The homeowner contracts with and pays the selected professional directly. Climate Pros SD doesn’t perform repairs, set contractor prices, or provide warranties.
You can confirm a contractor’s current status and classification through the California Contractors State License Board license check. That check is especially useful before approving work that goes beyond observation or routine homeowner care.
When to call us
Call when the dripping returns, water reaches the wall, ice appears, or the source remains unclear. Climate Pros SD will connect you with an independent HVAC professional serving San Diego County. Call us at (442) 777-6440 and we will match you with a licensed local pro.